Portable HamWAN Station
Posted on Sun 19 November 2017 in Amateur Radio
This post details the building and configuration of a portable, rapidly deployable HamWAN client station.
My interest in HamWAN and in particular that of building a small portable station was inspired from Kenny Richard's (KU7M) recent presentation at a Seattle ACS meeting about HamWAN.
HamWAN - Background Information
From the HamWAN.org website, HamWAN is:
A modern, multi-megabit, IP-based, digital network for amateur radio use!
HamWAN is a non-profit organization (501c3) developing best practices for high speed amateur radio data networks. HamWAN also runs the Puget Sound Data Ring, which is a real-world network implementation of the proposed designs.
Clients on the HamWAN network use commercial off-the-shelf MikroTik 802.11a WiFi hardware (typically with high-gain directional antennas) to connect to HamWAN's cell sites. HamWAN cell sites operate at frequencies in the 5.8-5.9GHz range which are included in the FCC's Part 97 5GHz spectrum.
I live in Seattle (West Seattle, specifically), which is right in the heart of HamWAN's Puget Sound Data Ring. I'm fortunate enough to have Line of Sight (LOS) to several HamWAN cell sites from my house.
Portable HamWAN Station
While I can easily install a permanently fixed HamWAN station at home, I'm particularly interested in having a nice clean, all-in-one portable unit that could be used for temporary events or emergency deployments.
Requirements:
- Connect to any HamWAN cell site
- The station must be capable of easily connecting to the HamWAN network without deployment-specific configuration changes .
- Provide local client connectivity
- Client access must be simple and not require any additional hardware. This includes easy local network access WiFi, and optionally Ethernet.
- Battery Powered
- All aspects of the unit should be self-powered, but optionally capable of accepting power from an external source (e.g., 12v PowerPole) if available.
- Modular
- The components of the station should all be independent and modular, so that they can be swapped out if needed. For example, the local access point may need to be removed, and one with better coverage connected in its place, or the battery field-swapped for another.
Bill of Materials
When I started this project, the specific client device I selected was not listed on HamWAN's list of recommended Client Hardware, however it is now listed there, I imagine due to my letting them know that it works well on the network.
-
Client Antenna/Modem - MikroTik SXTsq Lite5
- Product Code: RBSXTsq5nD
- Product Page: https://mikrotik.com/product/RBSXTsq5nD
- Brochure/Spec Sheet: https://i.mt.lv/routerboard/files/SXTsq_Lite5-170927120250.pdf
- Purchase - Streakwave: https://www.streakwave.com/itemdesc.asp?ic=SXTsq-Lite5
- Purchase - Amazon: https://smile.amazon.com/gp/product/B074WCWJD1
- It is critical that the International version is used, and not the US version. If the model number ends in -US (e.g., RBSXTsq5nD-US), do not purchase it!
- Amount I paid: $50.00
-
Local WiFi Access Point - MikroTik mAP
- Product Code: RBmAP2nD
- Product Page: https://mikrotik.com/product/RBmAP2nD
- Brochure/Spec Sheet: https://i.mt.lv/routerboard/files/mAP-171002090451.pdf
- Purchase - Streakwave: https://www.streakwave.com/itemdesc.asp?ic=RBmAP2nD
- Purchase - Amazon: https://smile.amazon.com/gp/product/B00N9ZI8IE
- Amount I paid: $47.95
-
Ethernet Cable - Generic 1ft
- Purchase Example - Amazon: https://smile.amazon.com/C2G-Snagless-Unshielded-Network-Ethernet/dp/B0002JFN0G
- Purchase Example - Monoprice: https://www.monoprice.com/product?p_id=11261
- Amount I paid: $1.00 (estimate)
-
Battery Pack - Rugged Geek RG600 Portable Jump Starter and Power Supply
- NOTE: I do not recommend this battery for reasons I'll cover below, but for now it is what my station is built with, so details are included.
- This particular product includes all required power cables for this project.
- Product Code: RG600
- Product Page/Specs: https://ruggedgeek.com/collections/all-products/products/rg600-portable-jump-starter-and-power-supply
- Purchase - Amazon: https://smile.amazon.com/gp/product/B01AKQPBE8
- Amount I paid: $79.99
-
Fastening Tape - 3M Dual-Lock Reclosable Fastener
- Product Code: SJ4575
- Purchase Example - Amazon: https://smile.amazon.com/gp/product/B004O99BGM
- Amount I paid: $15.57
Given the above Bill of Materials, my total cost was $194.51. If you already have a suitable battery you can use and some other fastening method, the cost for just the network equipment is only $98.95.
Hardware Details and Reasoning
I chose each component of the above BOM for very specific reasons, which I'll explain here.
-
Client Antenna/Modem - MikroTik SXTsq Lite5
- HamWAN's network design mandates the use of MikroTik client devices currently, due to the use of the NV2 TDMA protocol.
- This particular integrated Antenna/Radio was chosen primarily for it's incredibly small size, it's just under 5.1 inches square, and 1.3 inches deep!
- It is capable of dual-chain (aka dual-polarity, MIMO - Multiple-In, Multiple-Out) operation which is the current state of the art configuration on the HamWAN network.
- It is powered solely via Passive PoE (Power over Ethernet), accepting voltage from 10-30 volts DC.
-
Local WiFi Access Point - MikroTik mAP
- This was also chosen for its very small size, measuring 2.6 inches square by 0.75 inches deep.
- Versatile power input options: This unit can take DC power from POE input, MicroUSB, or a dedicated DC barrel connector. The barrel connector accepts input voltages from 8-57 volts DC.
- Passive POE (Power over Ethernet) Output: This is critical based on the SXTsq Lite5's requirement to be powered via POE. The mAP provides passive POE output at the mAP's input voltage minus 2 volts, with a maximum current draw of 500mA.
- The second Ethernet port on the mAP can be connected to another access point, switch, or computer to extend local network access.
-
Ethernet Cable - Generic 1ft
- At minimum, a single Ethernet patch cable is required to connect the Local WiFI Access Point (mAP) and the Client Antenna/Modem (SXTsq Lite5) to each other. This cable also provides power to the SXTsq Lite5.
- I made my own 1ft CAT6 patch cable for this, but any CAT5/5E/6 cable will suffice. Use the shortest possible to keep things tidy and reduce power loss, but have a longer one available if you need to connect to an external access point that is not at the same location at the Client Antenna/Modem.
- Category 5 cable at the minimum is sufficient, as the devices in use here are only capable of 100 Mbit/s, and not Gigabit. CAT5 is the minimum required category cable to work with POE.
-
Battery Pack - Rugged Geek RG600 Portable Jump Starter and Power Supply
- This battery pack was chosen because it is self-contained (battery, output voltage regulators, charge controller) and hence very easy to use.
- A second key requirement was that the battery can provide the highest voltage within our input specs as possible. This model can output 19 volts DC via its barrel connector output. This is useful because of the 500 mA max current the mAP can output via POE - therefore, the higher voltage it has to work with, the most available power (in terms of wattage) to the SXTsq Lite5, which will ensure stable operation at peak usage.
- NOTE: As mentioned above, I do not recommend this battery pack for this particular application.
- There is nothing inherently wrong with the product, in fact I believe it excels at what it's designed to do. Unfortunately though for this application, it's Automatic Power Off feature is problematic. The mAP access point does not draw enough power initially, and as such, the battery pack shuts off after a few seconds of operation.
- A work-around that I'm using is to, ironically, "jump-start" draw of the battery pack by connecting some USB device in to the battery pack to charge it until the mAP and SXTsq Lite5 are fully powered up, at which point the USB device can be disconnected.
-
Fastening Tape - 3M Dual-Lock Reclosable Fastener
- This was chosen to attach all of the components together in a modular manner. 3M Dual Lock is similar to hook and loop material, but both sides are hard plastic so there isn't a soft side that gets wet or pills up.
Physical Assembly
This Section is a Work In Progress - Check back for updates soon!
Photos
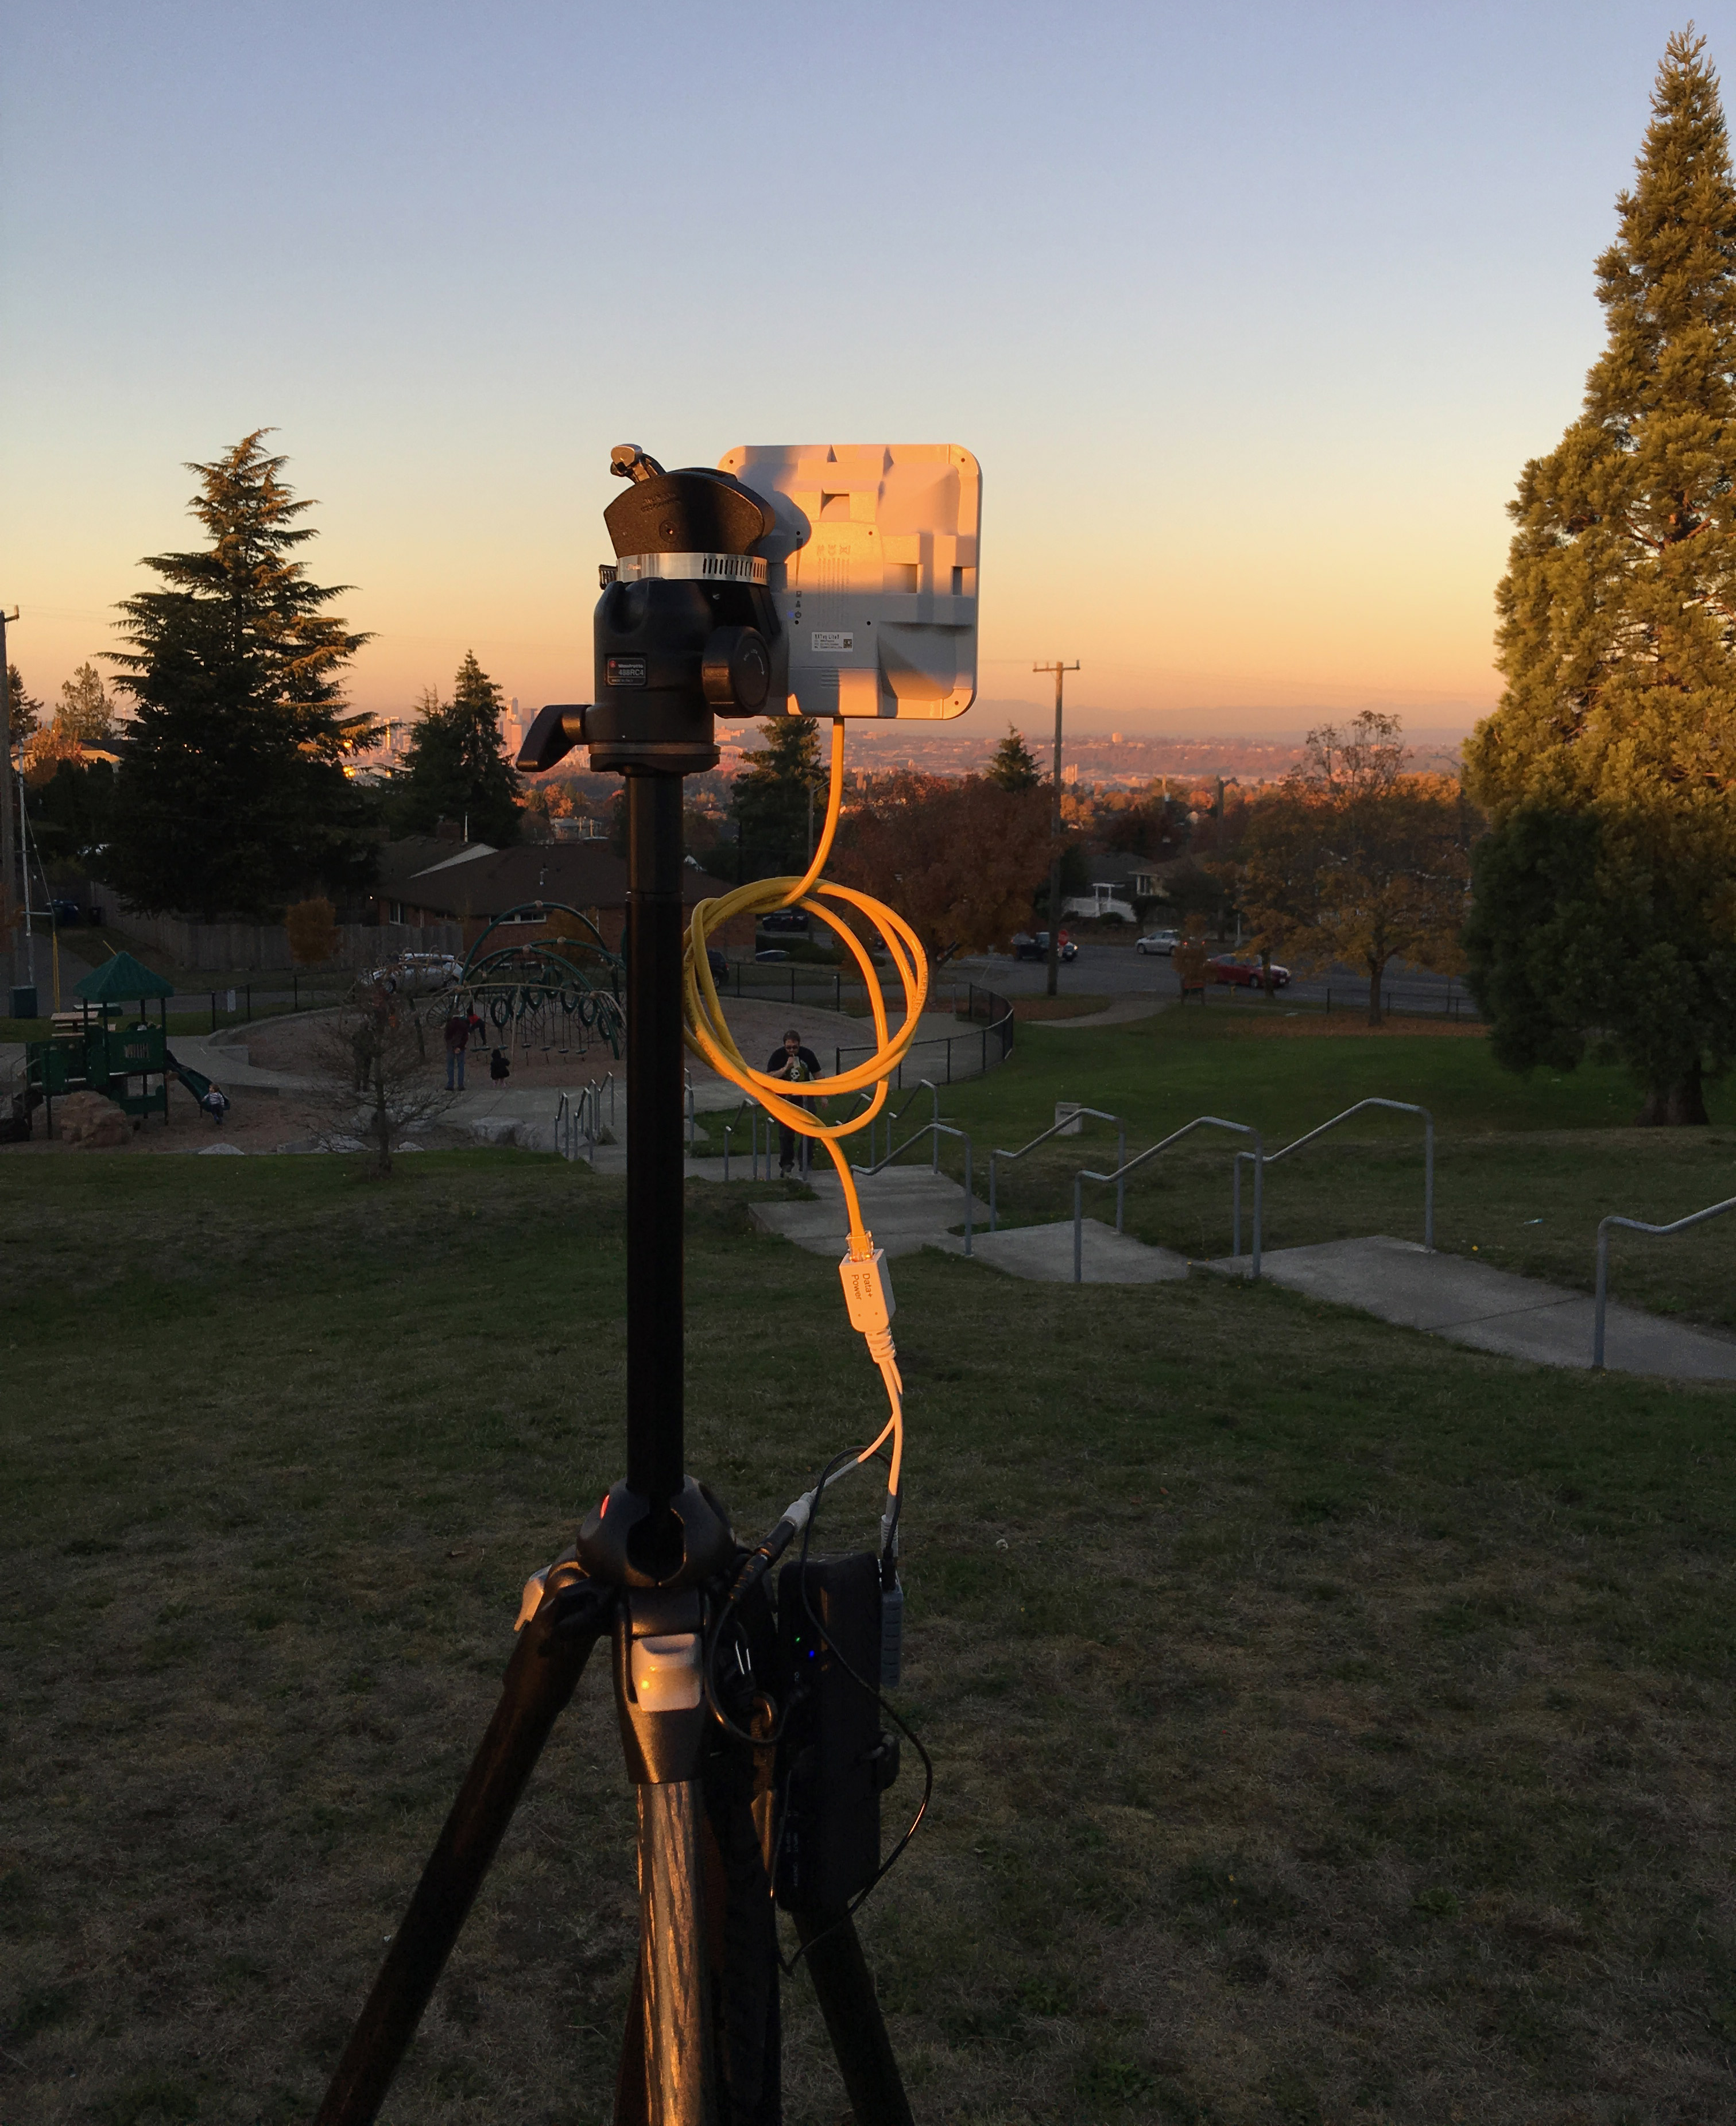
Here is how my device looked in early prototyping, hastily mounted on a camera tripod and tested at the Myrtle Reservoir Park in West Seattle.
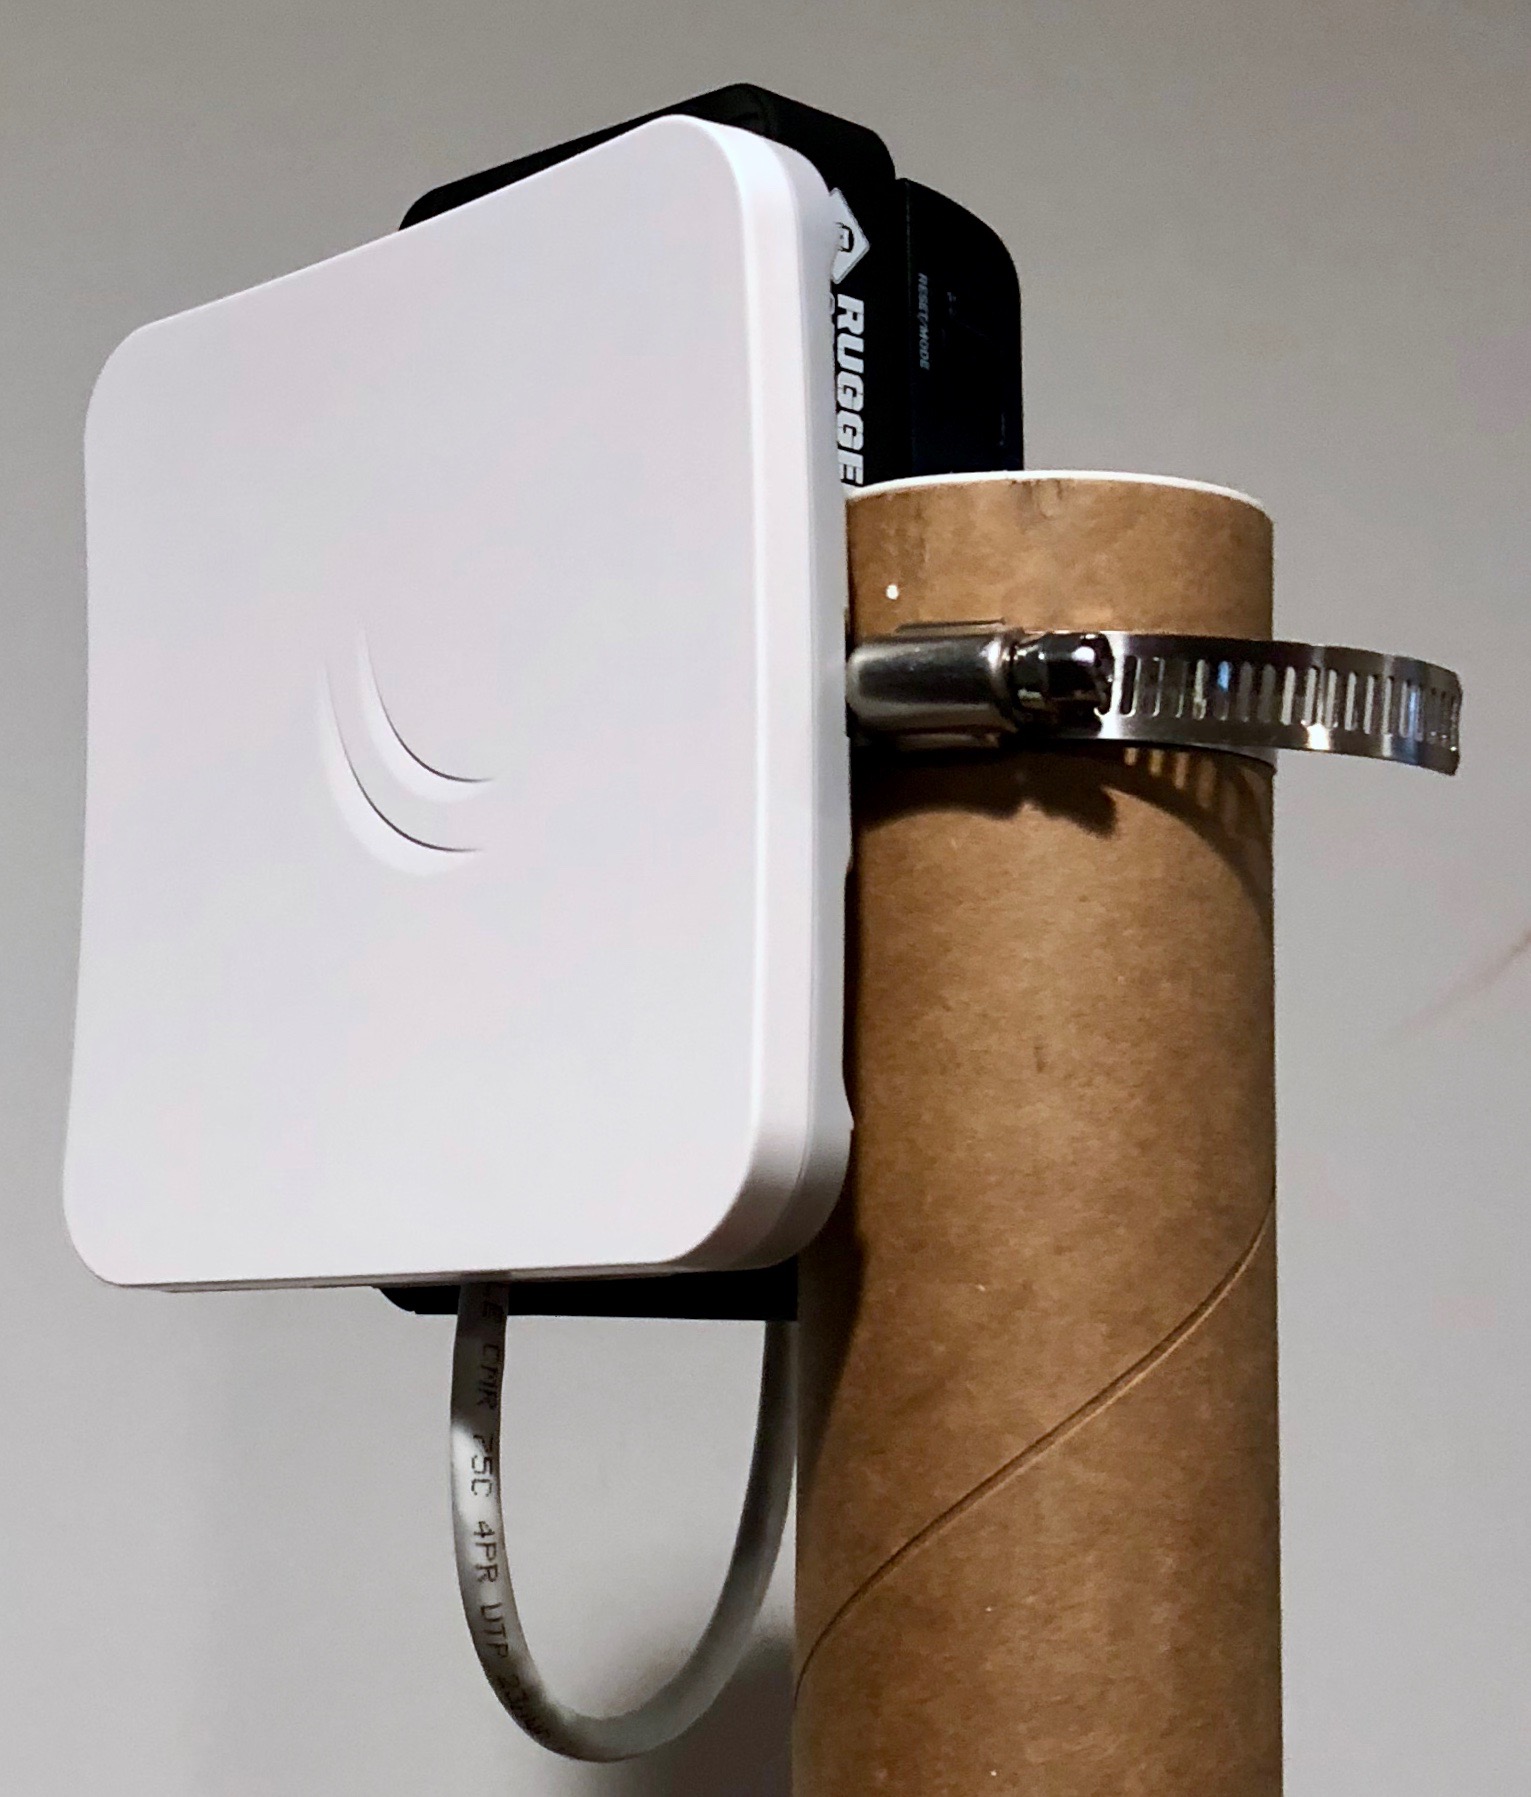
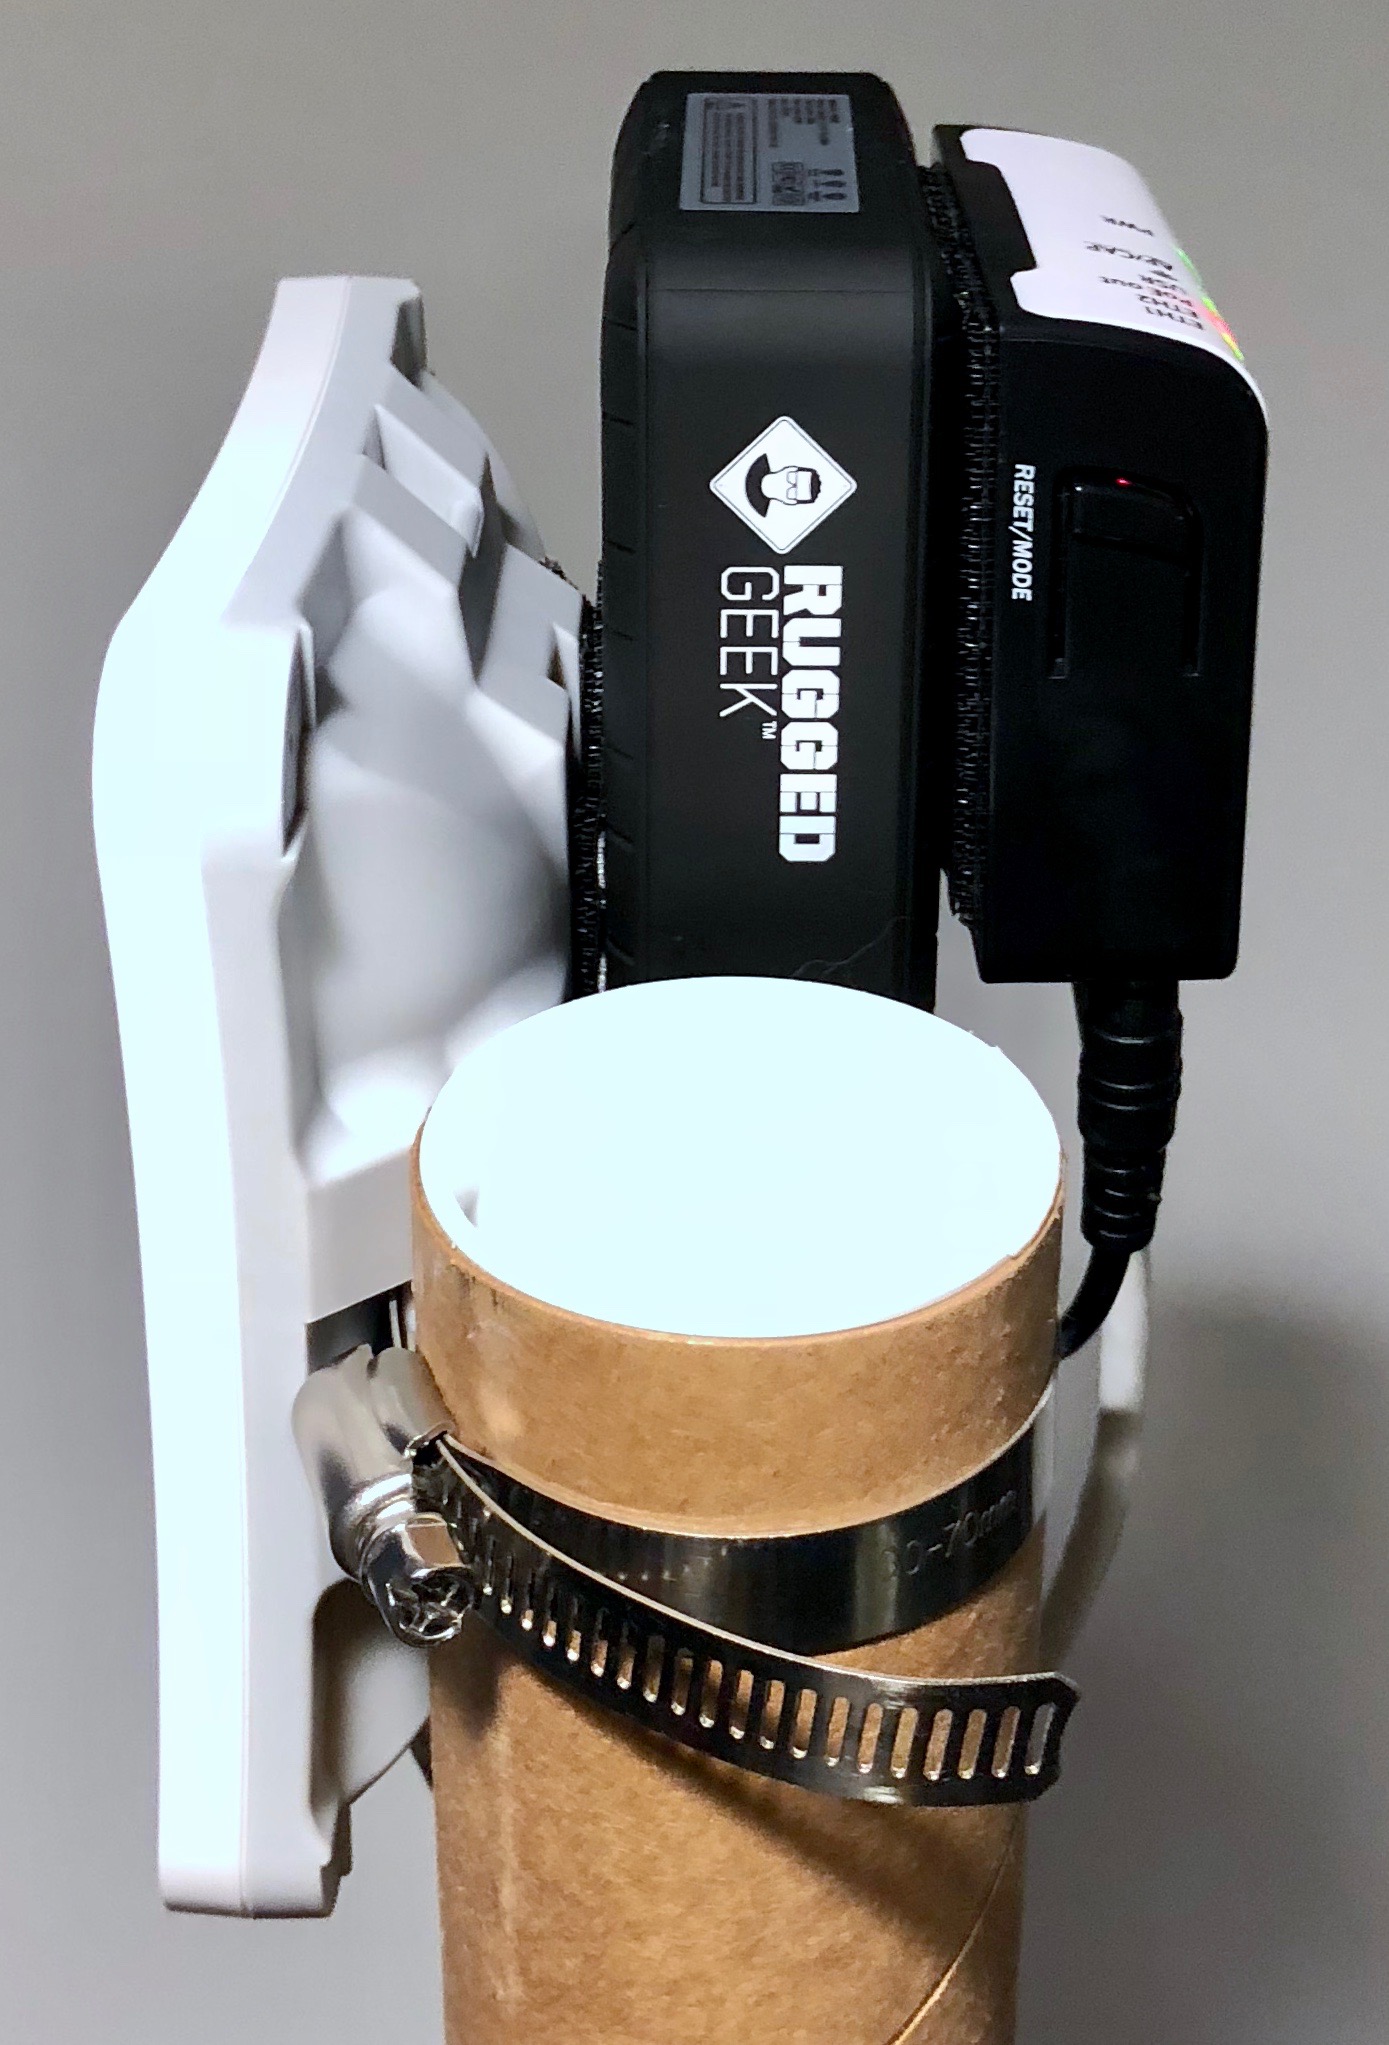
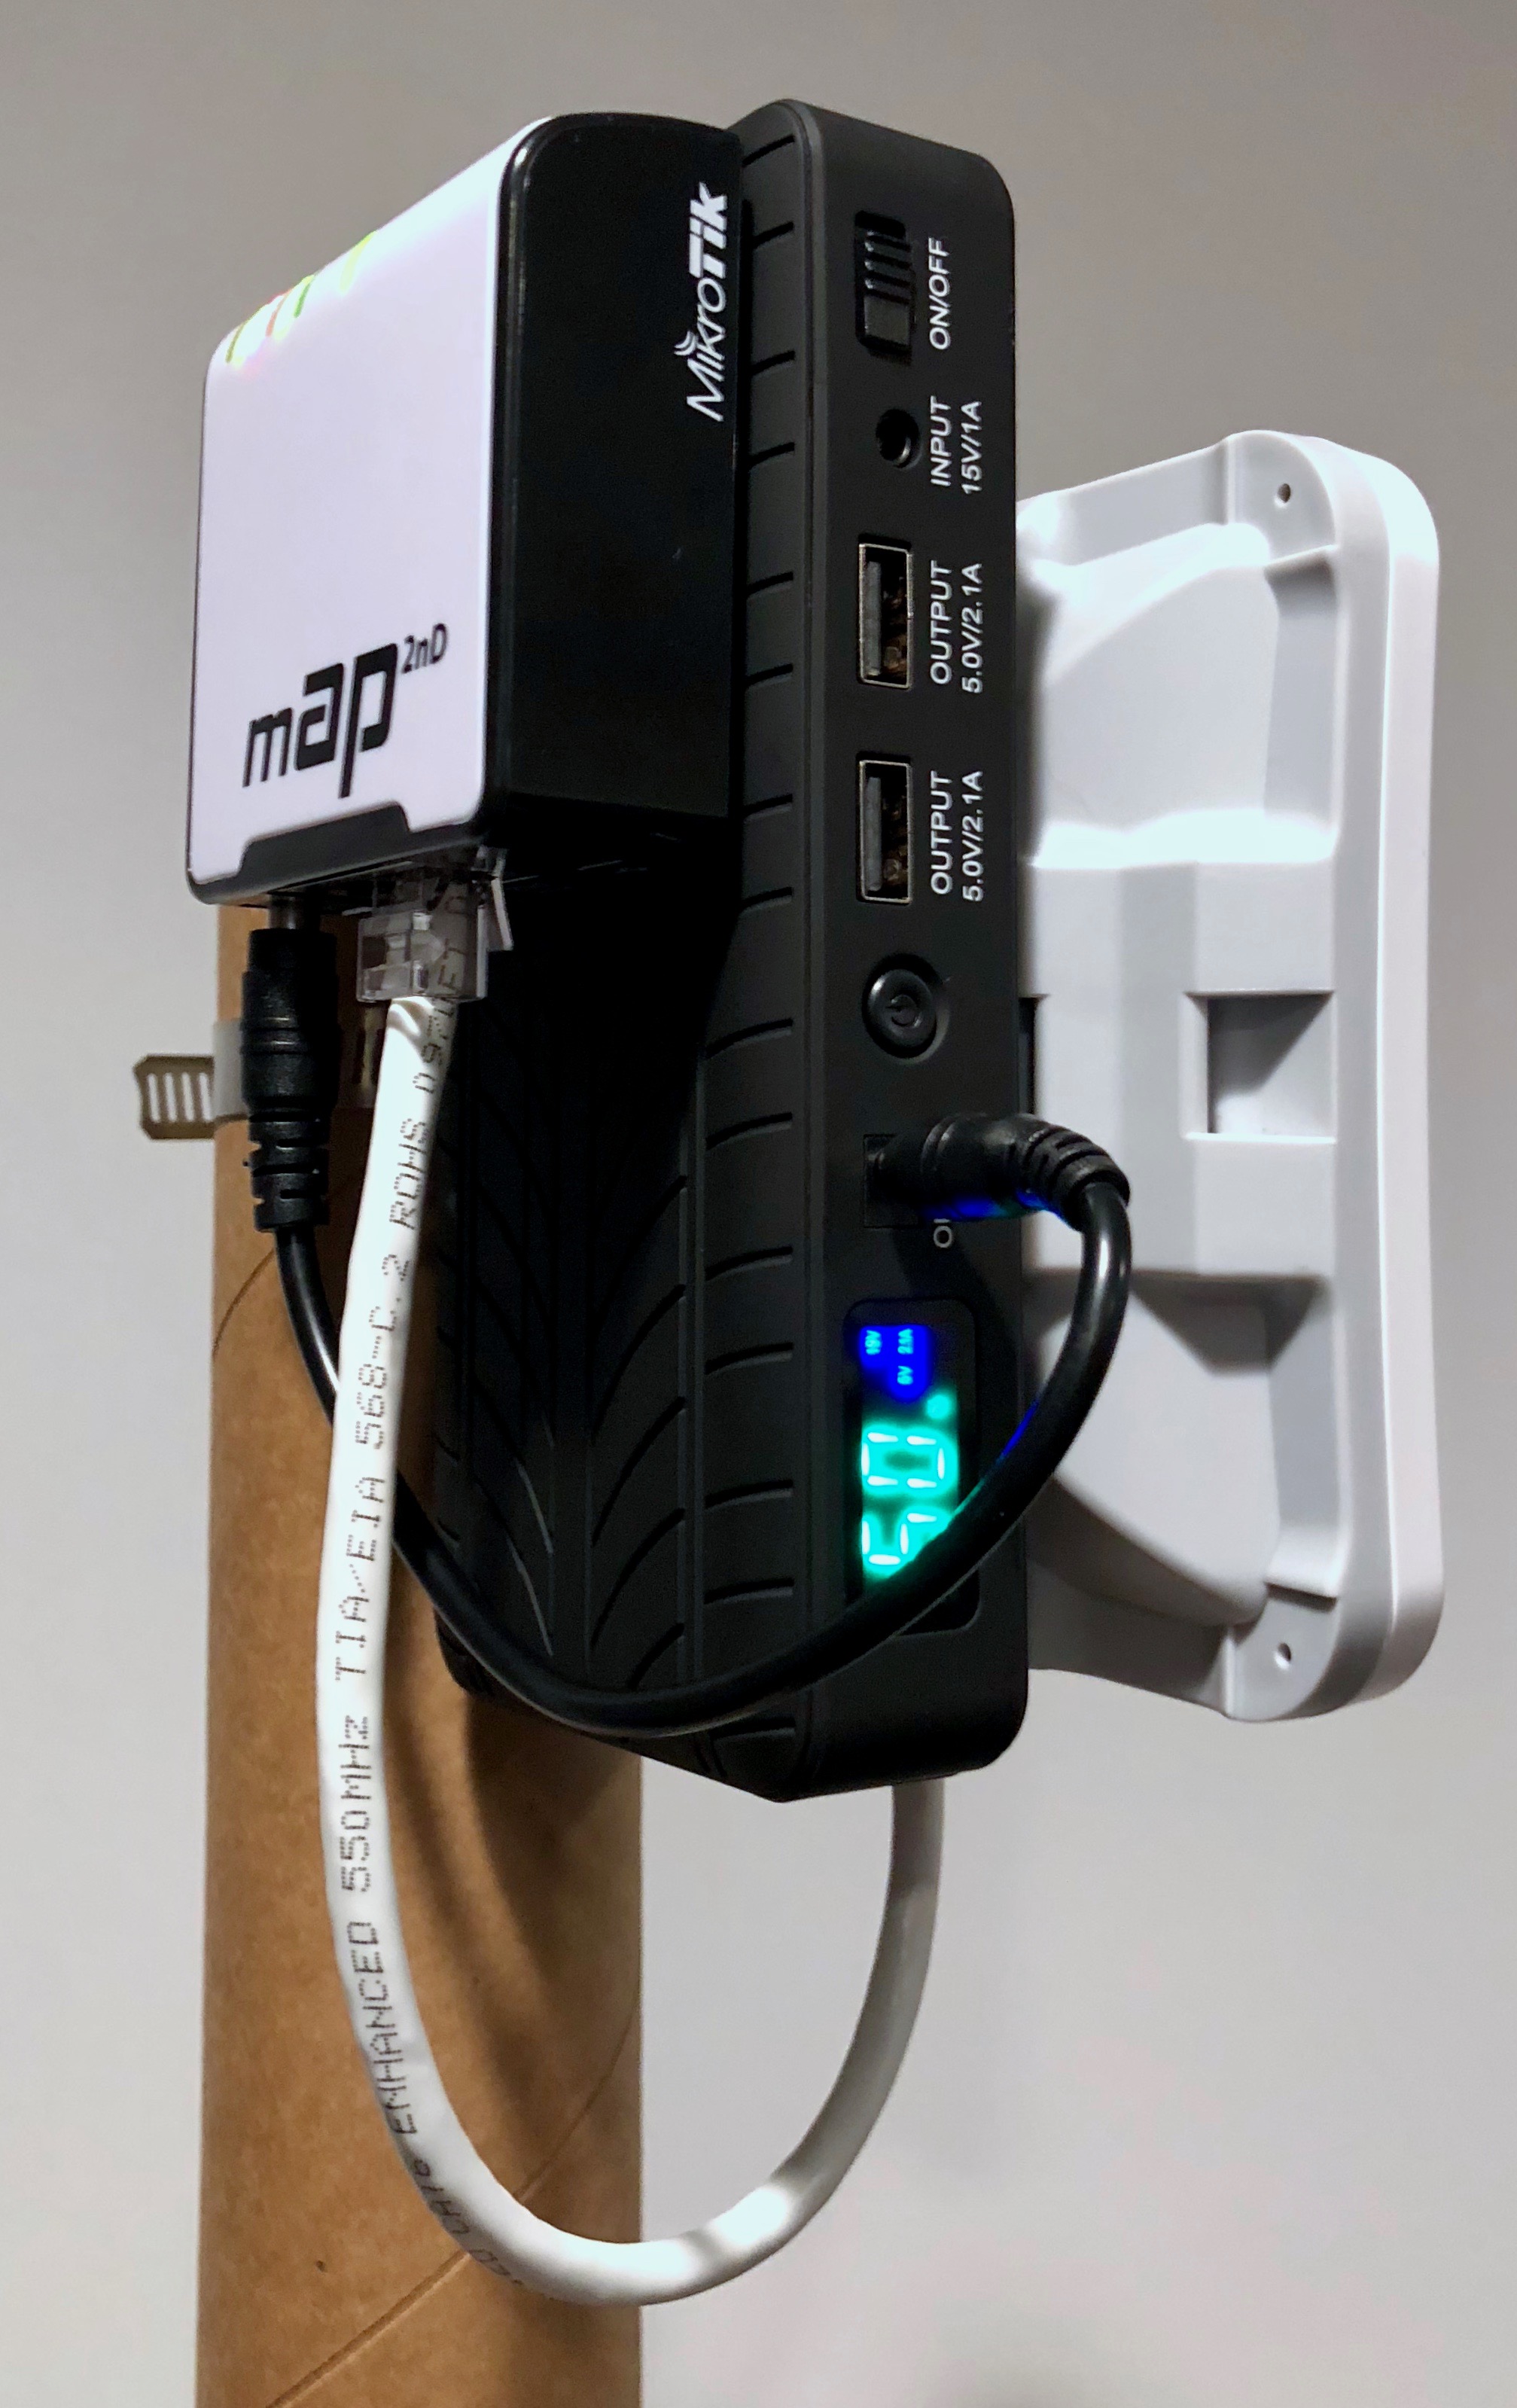
And here it is all assembled with the Dual Lock tape powered on, and mounted to a tube with the SXTsq Lite5's included hose clamp mount.
Future Updates
This post will be updated soon with more detailed assembly notes.
Additionally, I will post follow-up "Part Two" section that details the local network design and software (RouterOS) configuration on both the Client Antenna/Modem and Local WiFi Access Point. Stay tuned!
For the impatient, you can easily get almost all of the configuration done on the SXTsq Lite 5 by following HamWAN's instructions, here: HamWAN.org: Client Node Configuration. The mAP is suitable for basic use in this setup from its default out-of-the-box configuration.