Home Server Build
Posted on Mon 01 January 2018 in Computers
This post started as me wanting to take notes about a home server build of mine. Hopefully others find it useful - if you think I could add something, or find any errors in what I share here, please let me know with a comment!
This server build is almost entirely based on the build suggestions from a Reddit post in the r/PleX community. From that post, you quickly find the folks over at r/JDM_WAAAT who focus on building inexpensive home servers from used/refurbished enterprise SuperMicro/Intel/etc. gear. Of course, JDM_WAAAT is also a person who started the community (along with /u/manbearpig2012).
This is a true community behind these builds, and beyond the subreddit there is a dedicated and active Discord server with lots of people who are willing and able to help you with your build, or any questions you may come up with once you have your server. I suppose I am now among them - come say hi to me (cdine [US]) in #hardware!
I've also posted my build on the above subreddit: Build Complete Thread-Runner 2xE52680v2, 128GB 1333Mhz RAM, 4x 500GB SSD RAID10 : JDM_WAAAT
Bill of Materials
I'm keeping track of all the components in this server, their cost, and where I bought them from on a Google Sheets spreadsheet, rather than include it directly here, here's a live link to it:
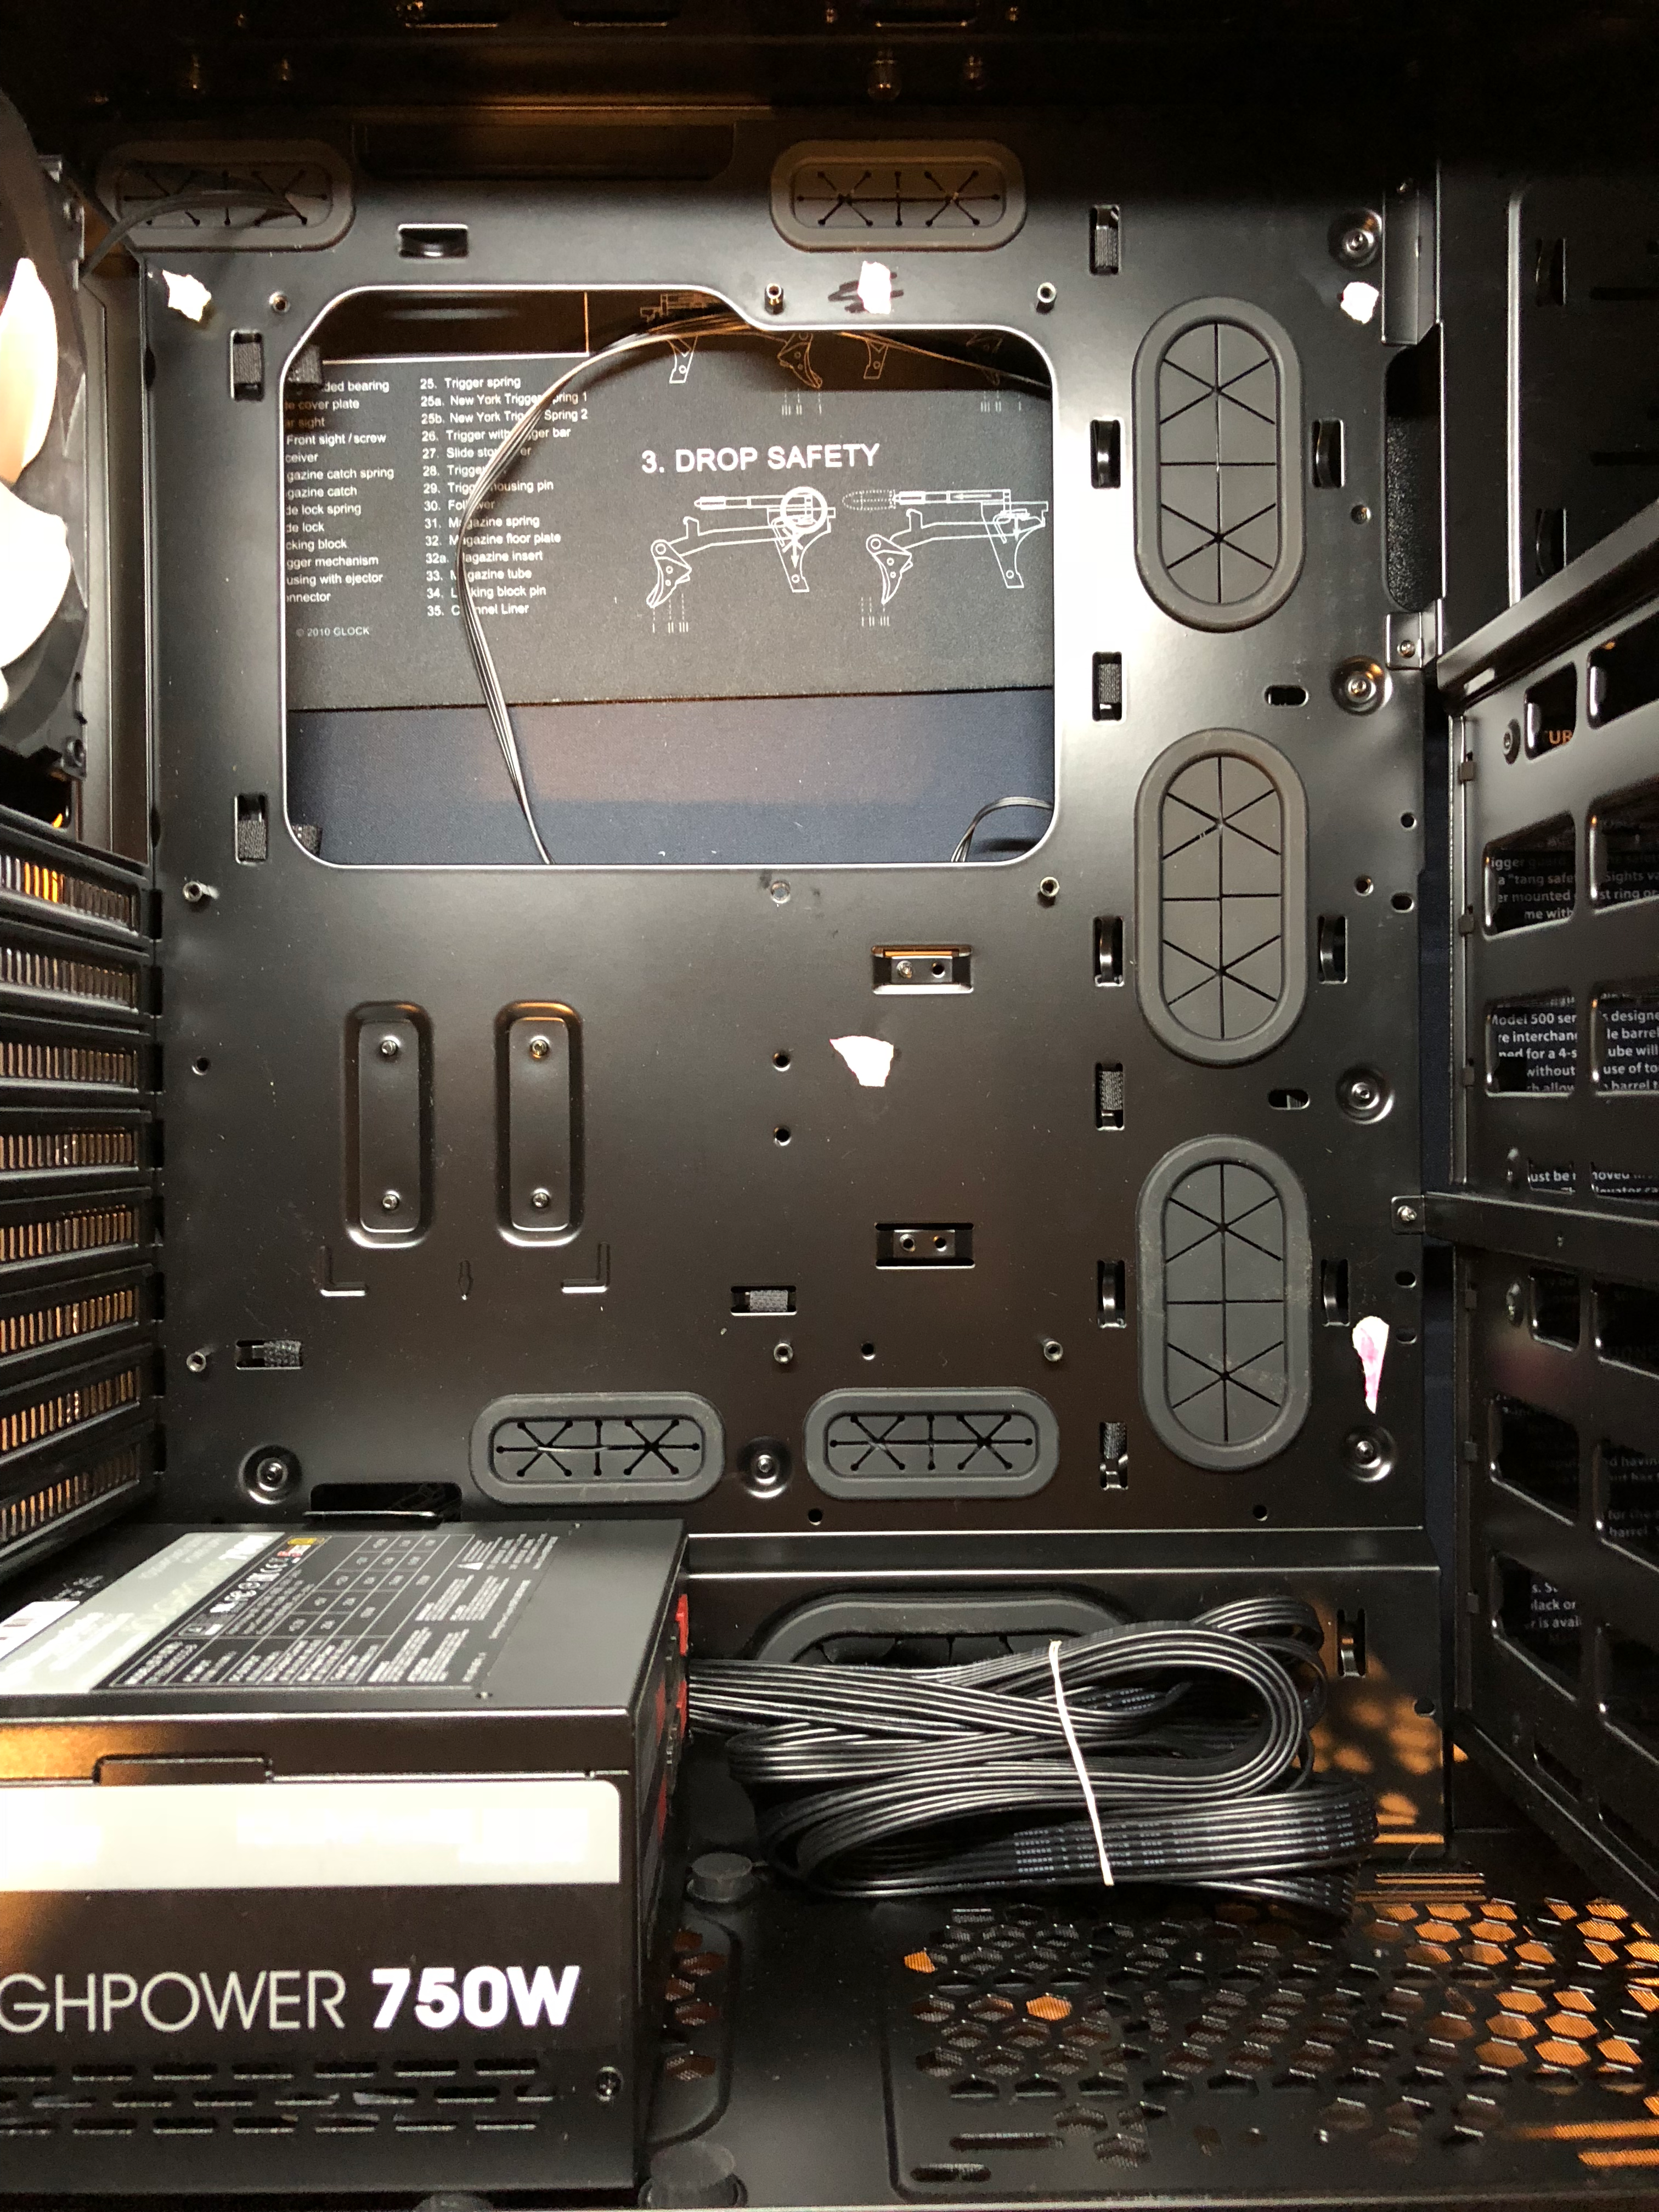
Case - Enthoo Pro
This case houses all of the components of this build quite nicely with enough room to work easily, while not being entirely obnoxious in size for home server or even as a workstation. The only noticeable defect for this case and motherboard combination is that a single stand-off mounting point on the front-middle of the S2600CP motherboard is missing on the case, making for an every so slightly weaker mount to the case. But it's not enough to worry about.
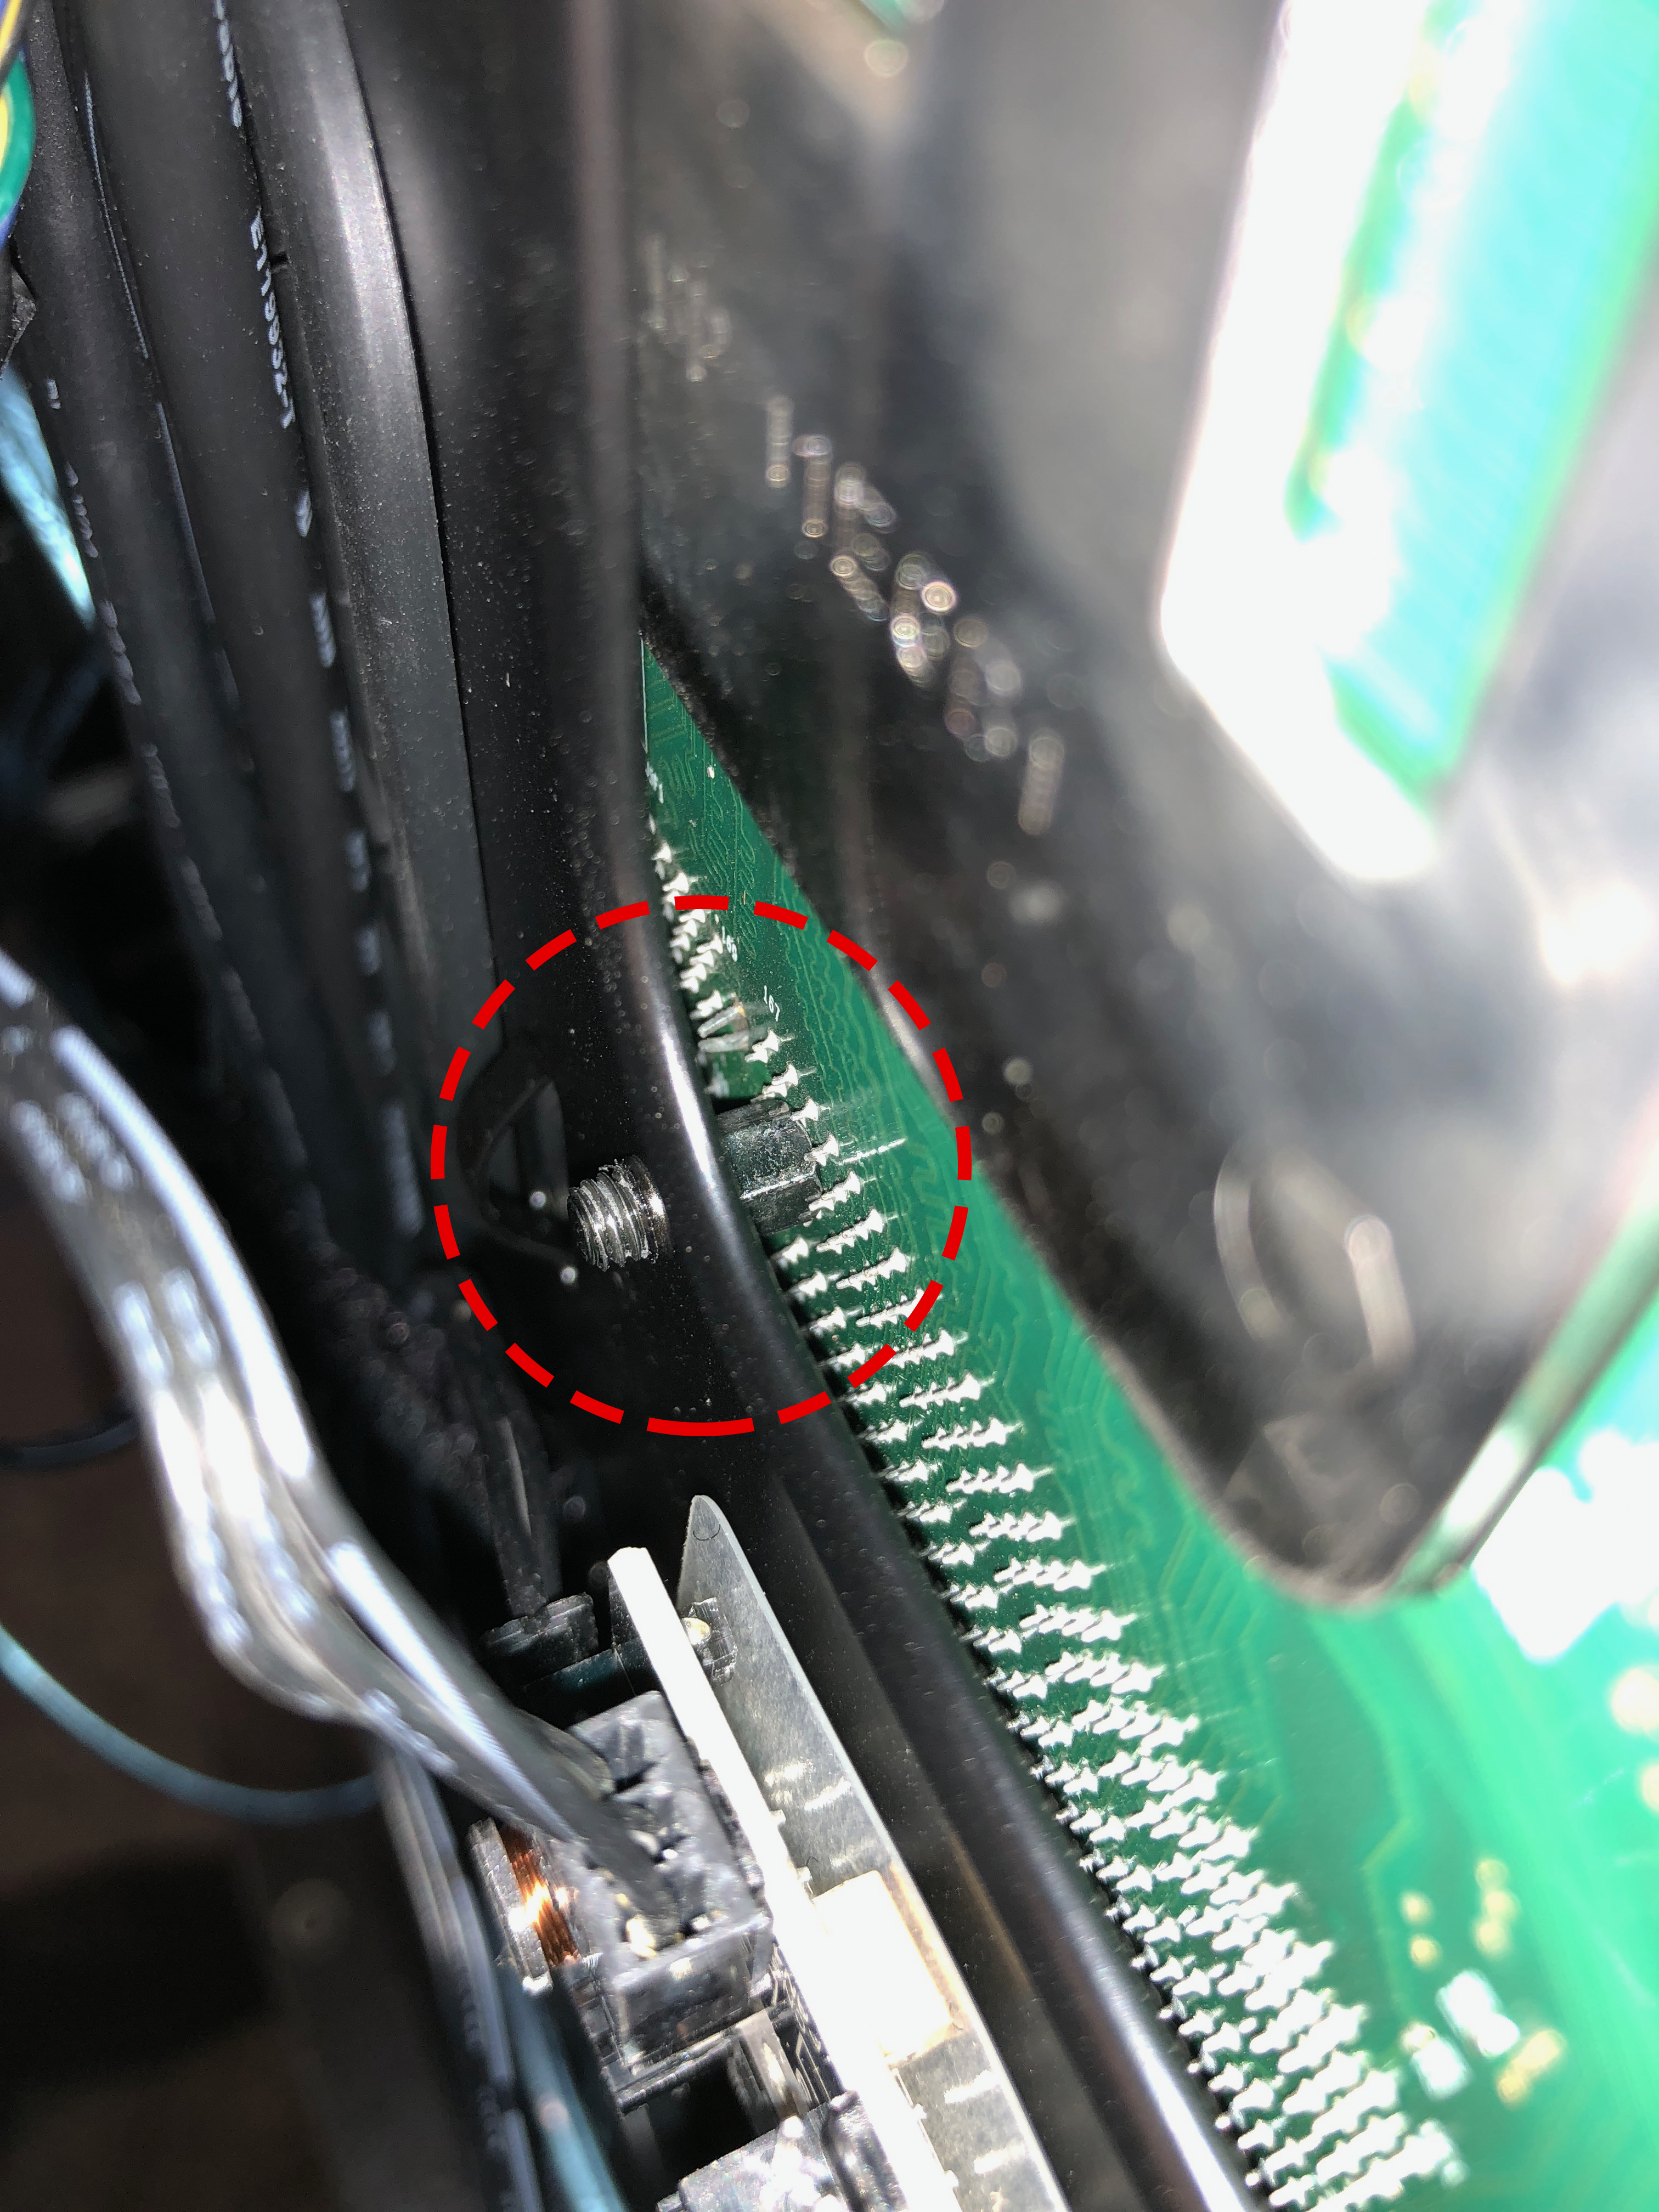
You must move some stand-offs on the case, see the below photo for places they need to be moved to/newly installed. The far-right middle mounting hole on the motherboard is the one that does not have a corresponding standoff location on the case.
The standoffs can be tightened with a 5mm socket. Be careful not to over tighten and strip the threads - the metal was so soft that even my demi-torque wrench set to "0nm" wouldn't actuate when they bottomed out.
No matter what you do - count how many standoffs you have installed and remember, even write down that number. When you install the motherboard, double-check that you used that same number of screws - no more, and certainly no less! If your numbers don't match, don't turn on the system - there's a good chance you have a stray standoff somewhere that could be shorting out pins. This happened to me, and I felt dumb - so beware! In my case it disabled (just temporarily until I fixed it) 2 DIMM slots because their pins were shorted.
This is what a solid DIMM Fault looks like:
The front connector on the motherboard (the Intel S2600CP) pinout can be found in the manuals, and a image of it is here: https://photo.qip.ru/photo/alevv36/151106810/xlarge/171583834.jpg - connect the front panel connector from the case to the motherboard appropriately. Be sure to get polarity right on the LEDs (polarity for the switches doesn't matter). The case reset switch goes to the front panel reset switch, not the NMI button header.
Fans
For my system, I have the following fan headers connected to the following fans. I may revise this in the future - the motherboard manual mentions that certain system fan headers are for certain zones (e.g. CPU Area, PCIe Area) - so re-arranging things to align with that may make sense.
Post-build note: The system seems to be very adequately cooled with this configuration, and the noise level is acceptable. I have not modified the FRUSDR configuration or changed much in the BIOS yet.
- CPU_FAN1: Arctic Arctic Freezer 12 CO
- CPU_FAN2: Arctic Arctic Freezer 12 CO
- SYS_FAN1: Case PWM Fan controller
- Front 200mm intake (Non-PWM)
- Rear 140mm exhaust (Non-PWM)
- SYS_FAN2: Bottom 120mm intake
- SYS_FAN3: Currently unused
- SYS_FAN4: Currently unused
- SYS_FAN5: Currently unused
- SYS_FAN6: Top 3x 120mm exhaust chained together
- SYS_FAN7: Currently unused
Below you can see how I installed the extra 120mm fans in the case.
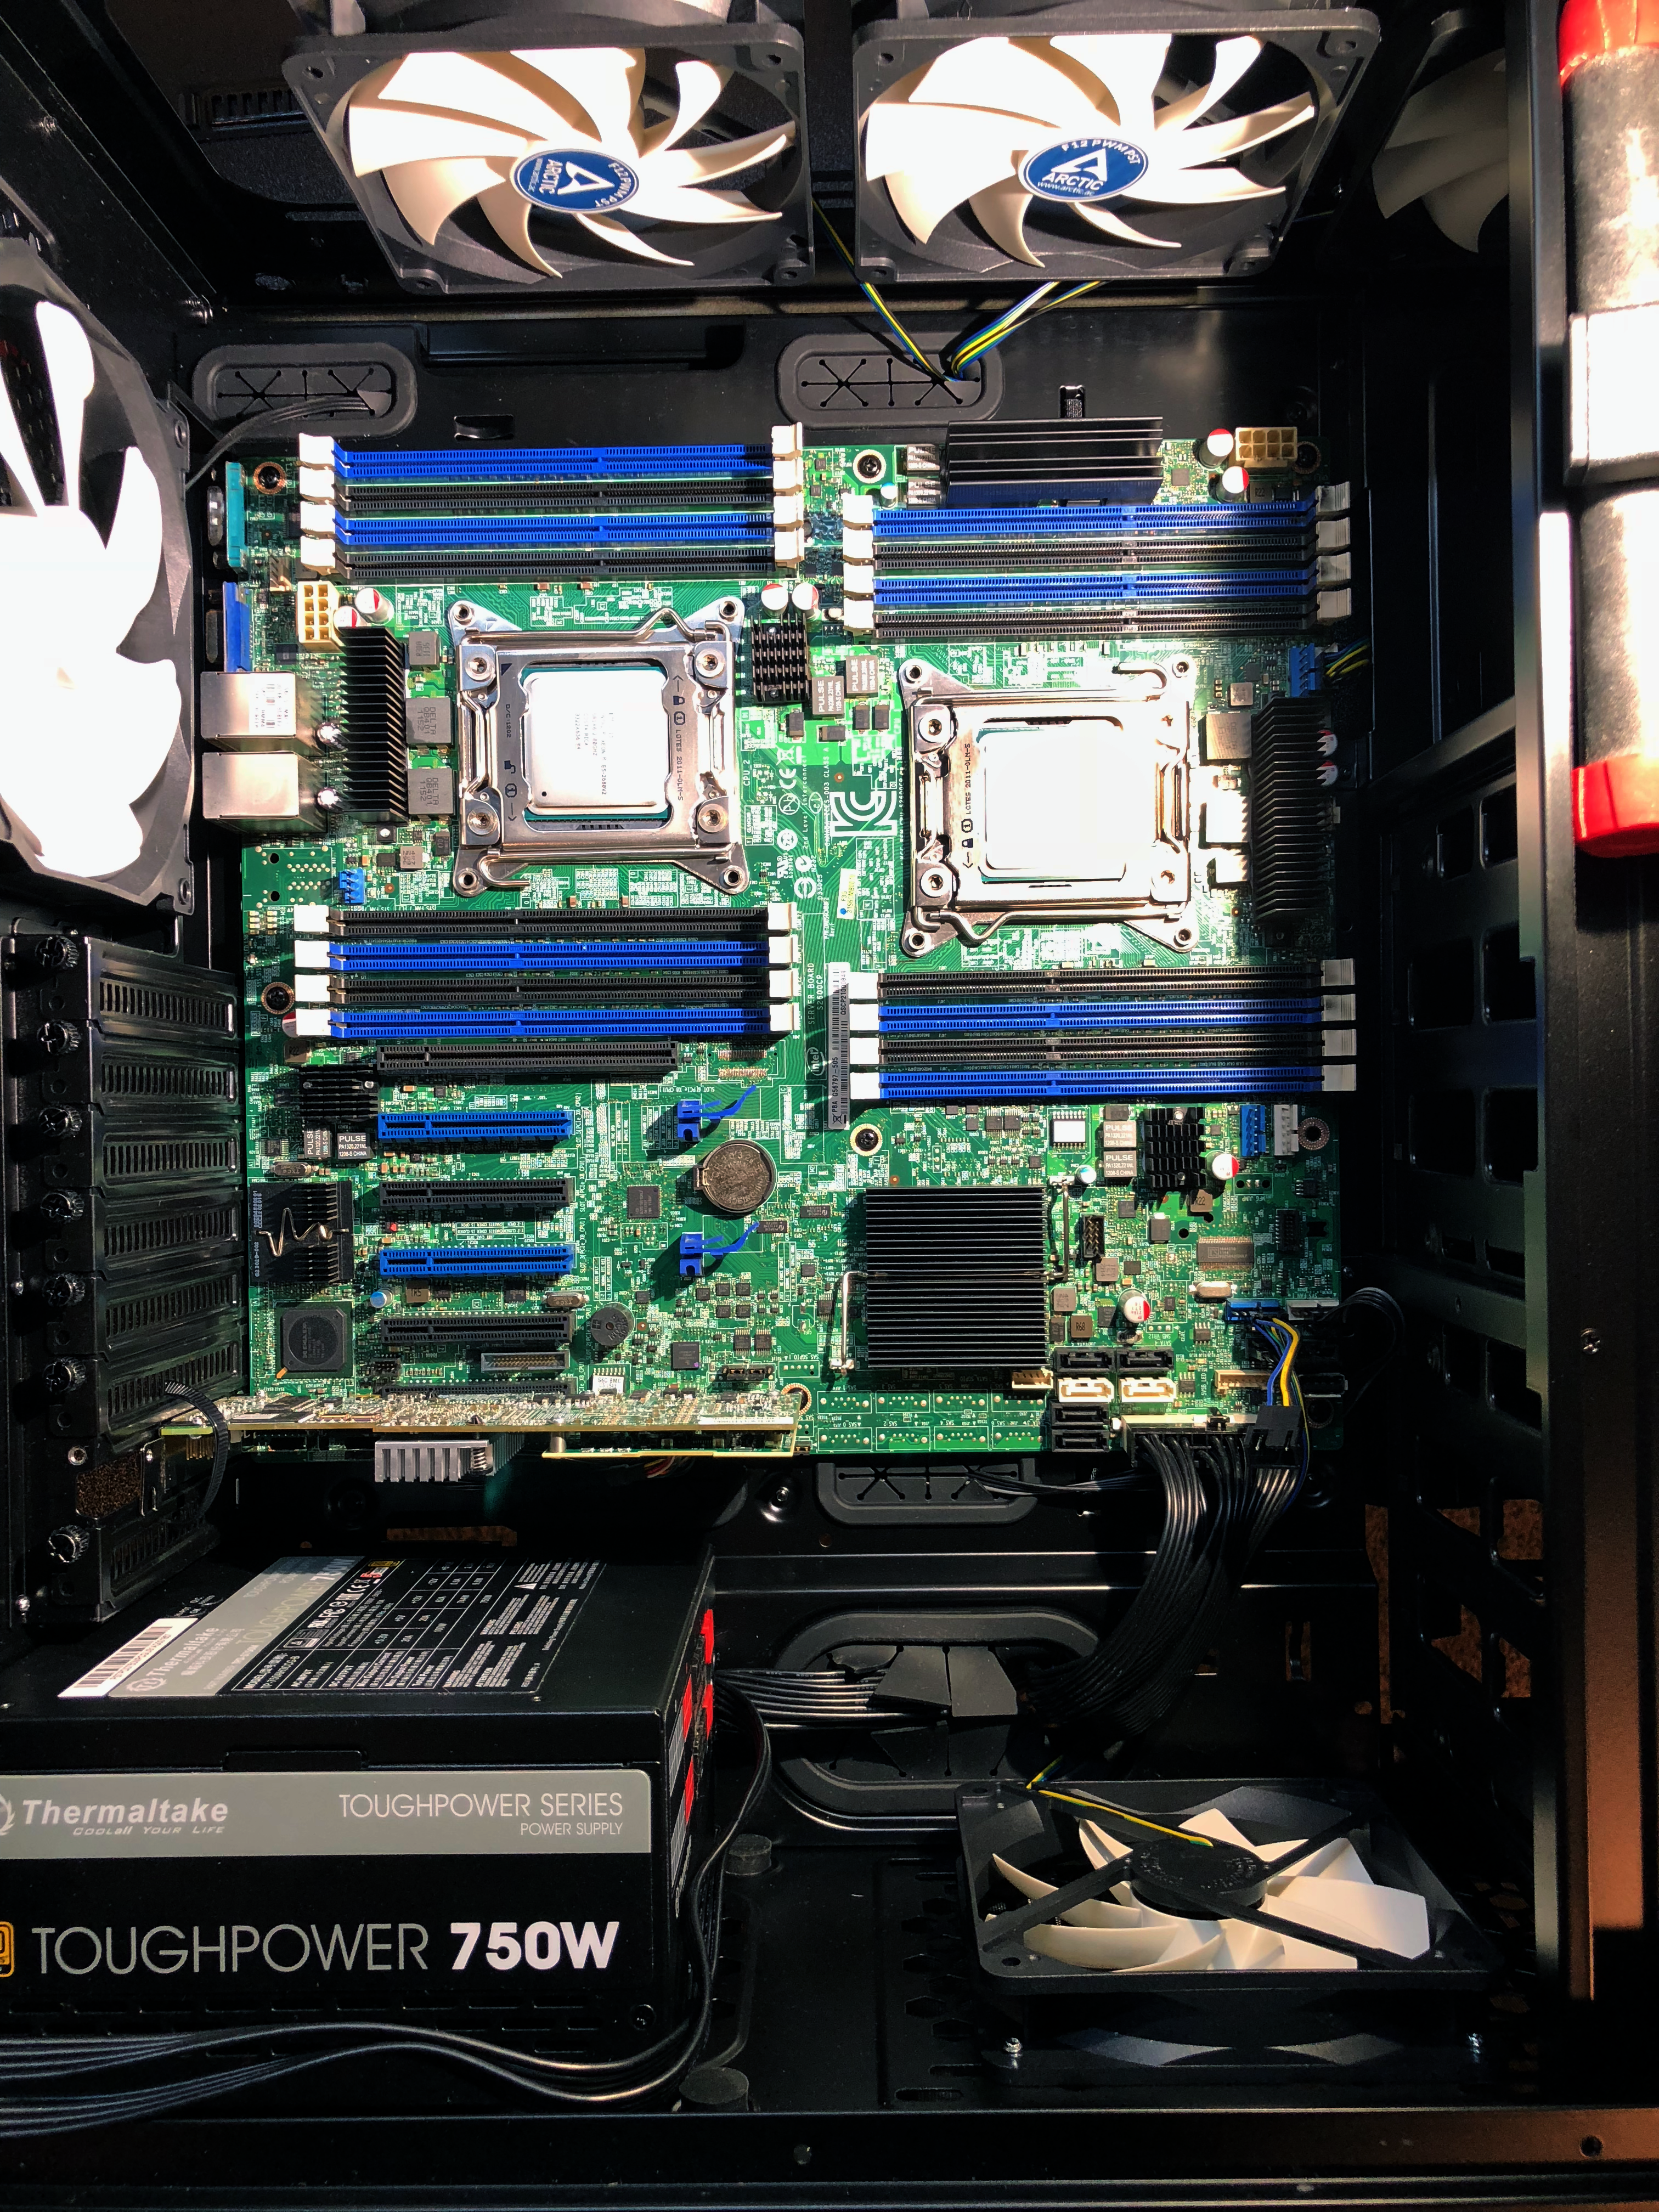
Motherboard - Intel S2600CP
- Initial BIOS version: SE5C600.86B.01.02.0003
- Aptio Setup Utility initial version: 2.00.1201
To use E5 V2 CPU(s), you must update the motherboard's firmware/BIOS. It's good practice to run a recent version anyways, so it's worth doing this initially.
This means before you get things running with your nice V2 CPUs you built this entire machine around, you must first use a V1 CPU to upgrade the BIOS!. Either borrow one from your friend who convinced you to build this thing in the first place, or buy one on eBay for around $5 - $10, such as an Intel Xeon E5-2603 SR0LB.
Instructions on how to update the BIOS can be found from Intel's documentation site for the S2600CP, which you'll want to visit for manuals and specification guides as well:
As of 2018-01-01, the latest available firmware package is from July 2017, and is located at this page (if in the future, be sure to check for a newer version), the download link is the blue button in the top-left "Available Downloads" box.
Sometimes the Intel download site is down, so I have a copy of the PDFs and BIOS update as of January 2018 mirroed on my site as well:
Be sure to read the Read Me (txt) linked to in the Release Notes section, and follow them precisely. In particular, ensure that your current board meets the minimum firmware version requirements - if not, DO NOT continue. Instead, you must perform incremental upgrades from previous versions, each time ensuring you meet the minimum version requirements. Not doing so can (and has) result in bricking your motherboard, which becomes a big hassle to resolve.
Verify that all versions meet the minimum requirements by checking in the main screen, and under SYSTEM INFORMATION:
- At the MAIN menu verify the BIOS revision is correct
- Move cursor to the SERVER MANAGEMENT Menu
- Move cursor down to the SYSTEM INFORMATION Option and hit Enter
The instructions are at the following URL for the current BIOS update as of 2017-01-01:
FRUSDR Update
As part of the BIOS update, you will be upgrading your motherboard's FRUSDR (Field Replaceable Unit/Sensor Data Record). This controls, among other things, how your system powers the fans connected to PWM fan headers on the motherboard.
You can use this to control how your system fan speed, and in turn system noise/performance characteristics. Without prior configuration, you can select Slow/Medium/Fast Ramp options for your fan speed. I'm not very familiar with this yet, but I believe the speed here indicates how quickly the system responds to increased temperatures - e.g. fast ramp would quickly spin up fans to higher speed to mitigate high temperatures, and slow ramp would do so more slowly, or perhaps with a lower maximum RPM.
You can control specific settings for the profiles by editing the file master.cfg alongside the update files before performing the upgrade.
The following blog post by Christian Sigg goes in to more detail on completely customizing fan behavior on a different model Intel server board, but the concepts should apply equally:
Intel also provides detailed information on the FRU/SDR upgrade process:
Here's a great thread on Serve The Home that has a lot of detail specific to this S2600CP motherboard - one I'll have to read more myself:
The FRU/SDR update process will also ask you if various fans are connected, answer with just a "y" (for yes) or "n" (for no) as appropriate. Following that, you will be asked if you have chassis intrusion detection connected, and if an NMI button is connected. The NMI button is not the same as the standard reset button used with most desktop-level cases, but is included in server cases, typically as a recessed (paper-clip) button.
FRU Update Error
While upgrading the FRU for my system, I ran in to the following error:
The FRU Headers for System FRU and file FRU are not matching
I couldn't find any resources detailing what to do here, but I found that if you re-run the UpdateFRUSDR step again and simply answer "n" (no) to all of the previous questions, and then allow it to upgrade the FRU at the end, it works. Figuring out how to properly program the FRU will be an exercise for a later date...
Motherboard Defects
~~My motherboard ended up having 2 bad DIMM slots. I verified that it was not the memory modules, and is in fact the slots. I simply messaged the seller on eBay and let them know this was the case, and without question they shipped me (via next-day air) another motherboard at no cost. I've yet to install that one, but hopefully it has no defects.~~
EDIT: I was wrong, this was entirely my error - I accidentally had a stray standoff under those DIMM slots, which caused a short and the system disabled those DIMMs due to that. Thankfully, once the standoff was removed - the DIMMs were re-enabled, so no permanent damage occurred. This may not be the case with all pins, so be careful! See my note about about keeping track of standoff count while installing the motherboard. I sure felt dumb!
But regardless, the sellers behavior here was great. This goes to the point JDM_WAAAT makes in his post - buy from reputable eBay sellers with great ratings, and they'll more than likely be easy to work with if something like this comes up. Don't forget to give them good ratings if they deserve it! (I let him know of my mistake, and am sorting out getting the replacement back to him / paying for it).
HBA - LSI 9260-8i
- Initial BIOS version: 3.24.00
- Initial Firmware version: 2.130.353-1918
Selecting an HBA (Host Bus Adapter) or RAID controller can be a daunting experience. There's a seemingly endless variety of controllers out there, and among any given vendor there may be dozens of models that have only slight differences. If you get a controller that is one standard behind speed-wise (e.g. right now, 6Gb/s instead of the current standard 12Gb/s) you can save a substantial amount of money. Sometimes you'll find a gem on eBay and similar places though. so it's worth educating yourself a bit about the different models in case you see a good deal.
A useful resource I found for comparing some common models out there is this forum post, I hope it helps if you haven't decided what you want/need yet:
IT vs. IR Mode
Note: I'm not refreshing my controller to IT (Initiator Target) mode, I am leaving it in and using it's built in RAID (Internal Raid) mode. I bought this card because of that feature, but it's common for people to prefer IT mode for use with certain software raid or NAS software - if you require IT mode, you can find guides on how to reflash online. Here are some:
- https://nguvu.org/freenas/Convert-LSI-HBA-card-to-IT-mode/
- Flashing LSI SAS HBA into IT mode, Supermicro BIOS setup & update - YouTube
Upgrading LSI Firmware
The easiest way to upgrade the LSI firmware is to use their StorCLI EFI utility. Just download that, copy the contents of the EFI directory on to a FAT32 formatted flash drive, and copy the latest firmware ROM alongside it.
- You can grab the latest StorCLI from Broadcom's (the current LSI owner) website here: https://www.broadcom.com/support/download-search?dk=storcli
- And the latest MegaRAID Firmware as of 2017-01-01 is 12.15.0-0239, available here: https://www.broadcom.com/support/download-search?dk=9260-8i
- Direct link to firmware: https://docs.broadcom.com/docs/12.15.0-0239zip
And in case these are hard to find in the future, here's a mirror of them on my site as well:
Your flash drive contents should look similar to the following:
- storcli.efi
- mr2108fw.rom
- Debug/
Then, just boot in to the servers built in EFI shell, change to the flash drive, and run StorCLI /c0 download file=mr2108fw.rom per the firmware update's readme, and reboot once it completes and tells you to do so.
New to using the EFI Shell? It's awesome! No more MS-DOS boot disks.
Change active drive (similar to DOS/Windows cmd shell):
fs0:- Switch to the first mapped/mounted drive
Wait, what drives do I have? Find out with:
map -r- use Page Up/Down to read it all if you have a lot that print out.
Navigating the filesystem:
-
dirorlsboth work to show contents of a directory. -
cd foo/will change to the directory foo
Reboot the system:
reset
If this is all too exciting to you, read more here: Intel - Basic Instructions for
Using EFI - you can also just run the help command and use tab-completion to figure things out. It's pretty simple if you're used to a Linux shell or even more so if you're familiar with the DOS/Windows command line.
HBA Configuration
Once you're HBA is actually ready to use, configuration is fairly simple with the LSI WebBIOS interface. Other brands will have various BIOS interfaces to setup your arrays and such. I've setup my 4 500GB SSD drives in RAID 10 (if they were enterprise grade, I'd perhaps do RAID 5, but I think the differences here for my purposes will be minimal, and RAID 5 may wear on the consumer drives more than is desirable). I have my other two pairs of drives setup as two independent RAID 1 mirrors.
System Boot Drive - Industrial SLC USB Disk On Module
I've always ran a lightweight hypervisor as my host OS, so having a small, reliable boot drive that is independent of storage disks/arrays is convenient. For my previous server build, I found these industrial USB SLC flash drives that are highly durable in terms of reads/writes, as well as environmental durability. I didn't want to use a consumer USB thumb drive for fear of it failing, and this wasn't terribly expensive. It's been working great for me for 6+ years, and it works great in this system as well.
This is the particular model and vendor where I got it from:
- WPMUM002G-MPITI-VS, -40C ~ +85C / 2GB / $45
- Industrial Micro USB Flash Modules (Embedded USB Disk) by APRO